Water pump repair can be challenging for many DIY homeowners. According to the U.S. Environmental Protection Agency, over 13 million homes rely on private wells, making water systems vital. Regular maintenance can extend the life of pumps and save costs. Yet, many homeowners may overlook signs of wear and tear.
Experts suggest that proper troubleshooting is crucial. In fact, a recent study found that 60% of water pump issues arise from user error. DIY repairs can be satisfying, but they demand a basic understanding of mechanics. It is easy to misdiagnose problems, potentially leading to more extensive repairs. Homeowners should approach repair tasks with caution.
Learning key tips on water pump repair can empower homeowners. Understanding when to fix and when to call a professional is essential. Mistakes in DIY repairs can be costly. Gathering knowledge beforehand helps mitigate these risks and enhances reliability. By sharing industry insights, we can encourage informed and effective repair practices.

Understanding common water pump issues is vital for DIY homeowners. Many homeowners face problems like reduced water flow or strange noises. According to recent reports, approximately 15% of households experience water pump failures annually. Knowing how to identify these issues can save time and money.
A common issue is air lock. Air trapped in the pump prevents water flow. Signs include sputtering faucets or inconsistent flow. Checking the system for leaks or air gaps is crucial. Additionally, blockage in the intake line can hinder performance. Cleaning filters regularly can prevent these common drawbacks.
Another frequent concern is overheating. Pumps may overheat due to continuous operation or lack of maintenance. Regularly inspecting the pump for debris and ensuring proper ventilation are essential. It’s important to remember that neglecting minor issues can lead to major breakdowns. Statistics show that proper maintenance decreases repair needs by up to 30%. Addressing small problems proactively can enhance pump efficiency and longevity.
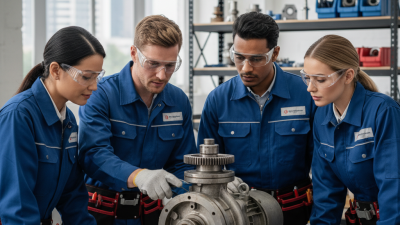
When tackling water pump repairs at home, having the right tools is essential. A set of wrenches is vital for loosening and tightening fittings. Choose adjustable and fixed sizes to cover various bolts. Additionally, a sturdy screwdriver set will help you manage screws effectively. Consider including both flathead and Phillips types for versatility.
Before starting any repair, gather a multimeter to test electrical connections. This tool is crucial for diagnosing electrical issues. A reliable rubber mallet can gently help in removing stuck components. It’s also wise to have a pair of work gloves. They protect your hands from sharp edges and chemicals.
While attempting repairs, keep in mind that mistakes happen. You might forget steps or misdiagnose problems. If an issue persists, take a step back. Review your process and ensure every component is addressed. Learning from these missteps can enhance your skills over time. Repairing your water pump helps foster a DIY spirit, but remember that patience is key.
Troubleshooting water pump issues can be daunting for many homeowners. A recent industry report indicates that over 30% of residential water pump failures stem from electrical problems. It's crucial to begin by checking the power supply. Ensure your pump is plugged in and the circuit breaker is not tripped. Simple checks can save time and prevent unnecessary repairs.
Listen for unusual noises during operation. Grinding or squealing sounds may imply worn components. According to experts, regular maintenance can extend the life of your pump by up to 50%. Examine hoses and fittings for leaks or blockages. Small leaks can lead to significant water loss. Evidence shows that up to 15% of a household's water bill can arise from these unnoticed issues.
If the pump runs but fails to move water, inspect the intake screen for clogs. Clear obstructions such as debris or sediment. This task is often overlooked but vital. Reflection on your DIY skills is important. If troubleshooting feels overwhelming, reaching out to a professional can ensure your water pump functions efficiently and reliably.
Preventive maintenance is crucial for extending your water pump's lifespan. Regular checks can help identify issues before they escalate. Research indicates that 70% of pump failures are due to improper maintenance. A simple inspection can catch wear and tear early on, reducing costly repairs.
Clean the pump and its surrounding area frequently. Debris can cause overheating and malfunctions. It's vital to check seals and connections for any leaks or damage. Data shows that 50% of pumps fail because of unnoticed leaks. By addressing these small issues, homeowners can ensure smoother operations.
Flushing the pump periodically is another effective strategy. It removes sediment build-up and enhances performance. Studies suggest that regular flushing can improve efficiency by up to 30%. It's a straightforward task that often gets overlooked, resulting in unnecessary wear on the system. Frequent monitoring and maintenance practices can create a more reliable water pump, saving time and money over the long term.
When undertaking water pump repairs at home, safety should be your top priority. Always wear protective gear. Gloves and goggles keep you safe from splashes or debris. Work in a well-ventilated area to avoid inhaling harmful fumes from the pump fluids. If the pump is electric, ensure that the power is disconnected before you begin your repairs. This can prevent potential electric shocks that could result in serious injury.
It’s also wise to inspect the area around the pump for any hazards. Remove clutter and ensure your workspace is clean. Consider the use of a first aid kit nearby. Accidents can happen, and quick access to medical supplies can make a difference. If at any point you feel unsure about a repair, don’t hesitate to seek professional help. Sometimes, a small mistake can lead to bigger problems.
Before doing any work, understand the anatomy of your pump. Familiarize yourself with its parts and functions. Misunderstanding how components work can lead to improper repairs. Document your work as you go. Take pictures or notes. This practice not only helps in case you need to backtrack but also fosters a better understanding of the repair process. Reflecting on each step can enhance your confidence in future repairs.
| Tip | Description | Safety Precautions |
|---|---|---|
| Check Power Supply | Ensure the pump is disconnected from the power source before performing any repairs. | Always unplug the pump to prevent electric shock. |
| Inspect Hoses | Look for cracks or damage in the hoses that may cause leaks. | Wear gloves to protect hands from sharp edges and damaged materials. |
| Clean the Impeller | Remove debris and obstructions from the impeller to ensure efficient operation. | Use safety goggles to protect eyes from flying debris. |
| Replace Seals | Damaged seals can cause leaks; replacing them can restore function. | Make sure to follow manufacturer instructions for seal replacement. |
| Test the Pump | After repairs, test the pump to ensure it operates correctly without leaks. | Keep the area clear of obstructions and be cautious of water around electrical components. |
sale@harbertpump.com,
sale@harbertpump.com